
Buying a compression wrist brace online can be confusing. Sizes vary, materials differ, and what feels “secure” to one person may feel painfully tight to another. If you have ever ordered a brace that slipped, dug into your skin, or left your fingers numb, you already know how much fit matters. This compression wrist brace buying guide explains how to measure, how a brace should feel, what materials work best for different needs, and how to avoid the most common fitting mistakes. To compare options from a full range of wrist and thumb support options, explore the FingerTipSplint shop.
Table of Contents
- How to Measure Your Wrist for a Compression Brace
- How Should a Compression Wrist Brace Fit?
- Which Wrist Brace Material Is Most Comfortable?
- Wrist-Only Brace vs. Wrist and Thumb Support
- Adjustable Straps, Ease of Use, and Everyday Comfort
- What to Check Before Buying a Compression Wrist Brace Online
- Seven Signs Your Wrist Brace May Not Fit Properly
- How to Put on a Compression Wrist Brace Correctly
- How to Keep a Wrist Brace Comfortable Over Time
- Is This Compression Wrist and Thumb Brace the Right Fit for You?
- Frequently Asked Questions
A well-fitting compression wrist brace should feel secure and supportive without causing pain, numbness, tingling, swelling, or changes in hand colour or temperature. Check the manufacturer’s sizing guide, measure your wrist as directed, and consider material, adjustability, thumb coverage, and intended use before buying. The right design depends on your needs and the level of support required.
How to Measure Your Wrist for a Compression Brace
Getting the right size is the single most important step in buying a compression wrist brace. A brace that fits poorly will not provide effective support, and it may cause new problems such as skin irritation or restricted circulation. But measuring correctly takes only a few minutes — and it prevents the frustration of ordering the wrong size.
Step-by-Step Measurement
- Use a soft measuring tape. A flexible tape measure works best. If you do not have one, use a piece of string and then measure the string against a ruler.
- Measure at the point specified by the manufacturer. Different braces use different measurement points. Some ask for wrist circumference at the narrowest point. Others ask for circumference at the widest point or across the palm.
- Keep the tape snug but not tight. The tape should sit against your skin without compressing it.
- Measure both wrists if applicable. Some people have different measurements on each side, especially if one hand is dominant.
- Compare with the exact product’s sizing chart. Do not rely on a generic chart — each manufacturer uses its own sizing.
- If you fall between sizes, choose the larger size. A brace that is slightly too large can often be adjusted. One that is too small cannot.
If you are measuring for a combined wrist and thumb brace, you may also need to measure thumb circumference or hand length. Check the product listing for the specific measurements required.
How Should a Compression Wrist Brace Fit?
The difference between “secure” and “too tight” is one of the most common sources of confusion for brace buyers. A compression brace should feel supportive, not restrictive. It should stay in place during activity without causing pain or altering sensation.
Secure Compression vs. Excessive Tightness
Secure compression means the brace provides gentle, even pressure around the wrist. You can feel it supporting the joint, but you are not aware of any specific pressure points. Excessive tightness means the brace creates areas of concentrated pressure, causes numbness or tingling, or leaves deep marks on the skin.
Strap Tension
Adjustable straps should allow you to fine-tune the fit. Fasten the straps gradually rather than tightening one strap all the way before starting the next. This distributes pressure evenly.
Movement and Slipping
The brace should not slide or rotate during normal activity. If it does, the fit or positioning may be incorrect. Do not compensate for slipping by tightening the straps excessively — this only creates new problems.
Pressure Points
Check for pressure points after putting on the brace. These are areas where the brace concentrates pressure, often at the edges of the straps or the thumb opening. If you feel pressure points, readjust the brace or consider a different size.
Wrist Brace Fit-Check Checklist
For a practical reference on brace fitting, The Rotherham NHS Foundation Trust’s guidance on using a wrist brace emphasizes secure but comfortable fastening and attention to skin irritation, pain, and swelling.
Which Wrist Brace Material Is Most Comfortable?
There is no single “best” material for a compression wrist brace. Comfort depends on your climate, activity level, skin sensitivity, and how long you plan to wear the brace. What works well for one person may be uncomfortable for another.
Flexible Fabric and Elastic Blends
These materials are lightweight, breathable, and generally well-tolerated for extended wear. They provide moderate compression and are easy to wash. Elastic blends are a good choice for everyday use in warm climates or during light activity.
Neoprene-Style Materials
Neoprene provides warmth and firmer compression. It is often used in braces designed for sports or cold-weather use. However, neoprene can trap moisture and may not be ideal for people with sensitive skin or for extended wear in warm conditions.
Moisture Management
If you plan to wear the brace during activity, moisture management matters. Breathable materials reduce the risk of skin maceration (softening and breakdown) that can occur when moisture is trapped against the skin.
Skin Sensitivity
If you have sensitive skin or a history of contact dermatitis, choose a material that minimises irritation risk. Look for smooth seams, soft edges, and hypoallergenic materials where available.
Materials also affect care requirements. Some braces are hand-wash only, while others can be machine-washed on a gentle cycle. Always check the care label before purchasing.
Wrist-Only Brace vs. Wrist and Thumb Support
One of the biggest decisions in choosing a compression brace is whether to get wrist-only support or a brace that also covers the thumb. The right answer depends on where your symptoms are and what level of support you need.
Wrist-Only Braces
A wrist-only brace wraps around the wrist joint, providing compression and support without restricting the thumb. It is often the better choice for conditions that primarily affect the wrist, such as wrist sprains or general wrist pain.
Wrist and Thumb Braces
A combined brace covers both the wrist and the base of the thumb. It provides more coverage but also more bulk. This design may be more appropriate for conditions that affect the thumb joint or thumb-side tendons, such as De Quervain’s tenosynovitis or thumb arthritis.
If you are unsure which area needs support, professional assessment can help. A healthcare provider can identify the source of your symptoms and recommend the appropriate brace design.
Adjustable Straps, Ease of Use, and Everyday Comfort
The fastening system on a compression wrist brace affects how easy it is to put on, how evenly pressure is distributed, and whether the brace stays in place during activity.
Adjustability
Look for straps that are easy to adjust and that stay where you set them. Velcro and hook-and-loop closures are common and generally reliable. Elastic straps that slip or stretch over time may provide less consistent support.
Ease of Putting On and Removing
If a brace is difficult to put on, you are less likely to wear it consistently. Consider whether you can manage the fastening system independently, especially if you have weakness or pain in the other hand.
Pressure Distribution
Straps that are too narrow can create pressure points. Wider straps distribute pressure more evenly and are usually more comfortable for extended wear.
Staying in Position
The brace should remain in the correct position during ordinary movement. If it shifts during typing, cooking, or light activity, the fit or fastening may need adjustment.
What to Check Before Buying a Compression Wrist Brace Online
Buying a brace online is convenient, but it requires more careful evaluation than buying in person. Here is a purchase checklist:
- Sizing information: Does the product page include a clear size chart and measurement instructions?
- Intended use: Does the product description match your needs (wrist-only, wrist and thumb, sports, everyday wear)?
- Thumb coverage: Does the brace cover the thumb area, and is that appropriate for your symptoms?
- Material: What is the brace made of, and is the material compatible with your skin and climate?
- Fastening system: How does the brace fasten, and is it easy to adjust?
- Care instructions: Can you follow the cleaning and maintenance requirements?
- Product images: Do the images show the brace clearly, including strap placement and thumb opening?
- Return policy: Can you return or exchange the brace if it does not fit?
- Manufacturer information: Is the manufacturer reputable and transparent about product specifications?
According to Northern Care Alliance NHS guidance on wrist braces, positioning, fastening, and comfortable movement are essential considerations for anyone using a brace.
Seven Signs Your Wrist Brace May Not Fit Properly
A brace that fits poorly can cause new problems. Here are seven signs to watch for and what to do about each.
A brace that moves during activity is not providing consistent support.
Solution: Recheck size, positioning, and fastening instructions.
Narrow or over-tightened straps can cause pressure points and irritation.
Solution: Loosen and reposition the straps. Consider a different design.
An ill-fitting thumb opening can cause friction and skin irritation.
Solution: Check alignment and whether the design or size is suitable.
This is a warning sign that the brace is too tight or positioned incorrectly.
Solution: Loosen or remove the brace. Stop using it if symptoms persist.
This indicates restricted circulation and requires prompt attention.
Solution: Remove the brace and seek medical advice if symptoms persist.
Skin irritation is a sign that the brace is not compatible with your skin or fit.
Solution: Inspect the skin and discontinue use if irritation continues.
The brace may be the wrong design for your condition, or the fit may be incorrect.
Solution: Stop and reassess with a qualified professional.
How to Put on a Compression Wrist Brace Correctly
Putting on a compression wrist brace correctly takes a few minutes and prevents many common fit problems. Follow this numbered process:
Step 1: Read the instructions. Understand how the brace is designed to be worn and for what purpose.
Step 2: Check sizing and orientation. Confirm the brace is the correct size and that you are putting it on the right way (some braces are left- or right-hand specific).
Step 3: Open the fastening straps. Open all straps before putting on the brace. This makes it easier to position correctly.
Step 4: Position the wrist and thumb sections. Follow the manufacturer’s diagram or instructions. The wrist section should sit over the wrist joint, and the thumb section (if present) should sit at the base of the thumb.
Step 5: Fasten gradually. Tighten the straps a little at a time, alternating between them so pressure is distributed evenly.
Step 6: Check for sliding, twisting, or rubbing. Move your hand through its normal range and check that the brace stays in place.
Step 7: Recheck comfort and sensation. After a few minutes, check for numbness, tingling, colour changes, or skin irritation.
How to Keep a Wrist Brace Comfortable Over Time
Comfort does not end at the checkout. Keeping a brace comfortable over time requires attention to care, skin health, and how the brace fits as your condition changes.
- Follow the care label. Do not assume all braces can be machine-washed. Some require hand-washing and air-drying.
- Keep the skin and brace clean and dry. Moisture trapped under a brace can cause skin maceration.
- Inspect the fastening straps and fabric for wear. Worn straps may not hold the brace securely.
- Recheck the fit if swelling changes. Swelling can change the fit of a brace, especially after injury.
- Avoid wearing a brace continuously unless instructed. Follow the recommended wearing schedule.
- Follow prescribed wearing schedules. If the brace is part of a treatment plan, follow your clinician’s instructions exactly.
According to Leeds Community Healthcare NHS guidance on wrist and hand problems, sizing and general fit checks are essential to comfortable and effective brace use.
Is This Compression Wrist and Thumb Brace the Right Fit for You?
If you are evaluating compression wrist and thumb braces against the criteria in this guide, the Compression Wrist & Thumb Support Brace from FingerTipSplint is one option to review. This guide does not claim that it is universally the best brace, or that it treats any specific medical condition. What it offers is a compression design intended to support the wrist and thumb during daily activities.
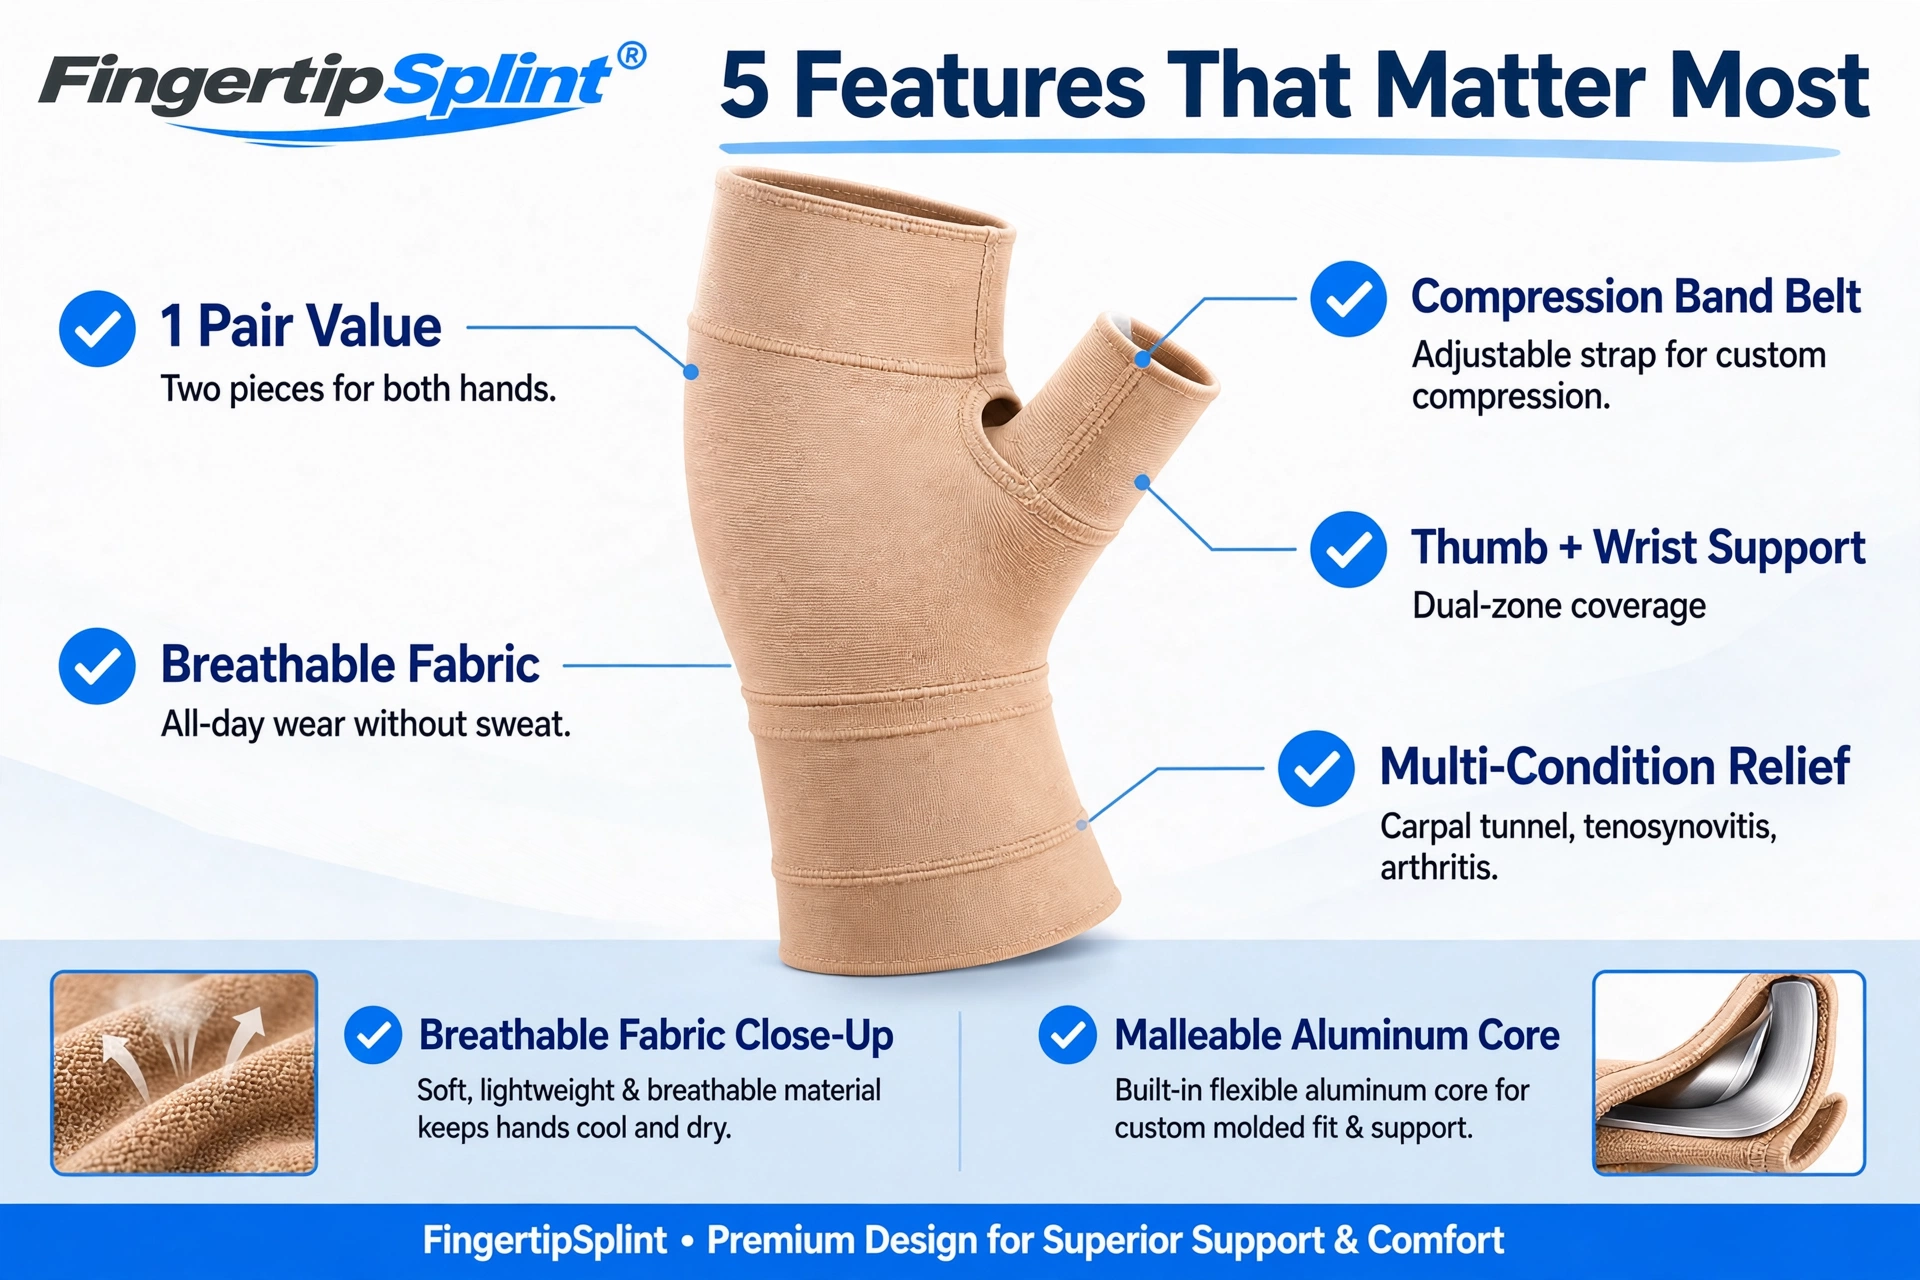
Evaluate it against four buyer questions:
- Coverage: Does the product support the wrist only, or does it also wrap around the thumb?
- Adjustability: Can the fastening system provide a secure fit for your measured wrist?
- Comfort: Are the material, bulk, and construction appropriate for the duration and activity you have in mind?
- Suitability: Does the design match your needs, or is a different type of support or professional assessment more appropriate?
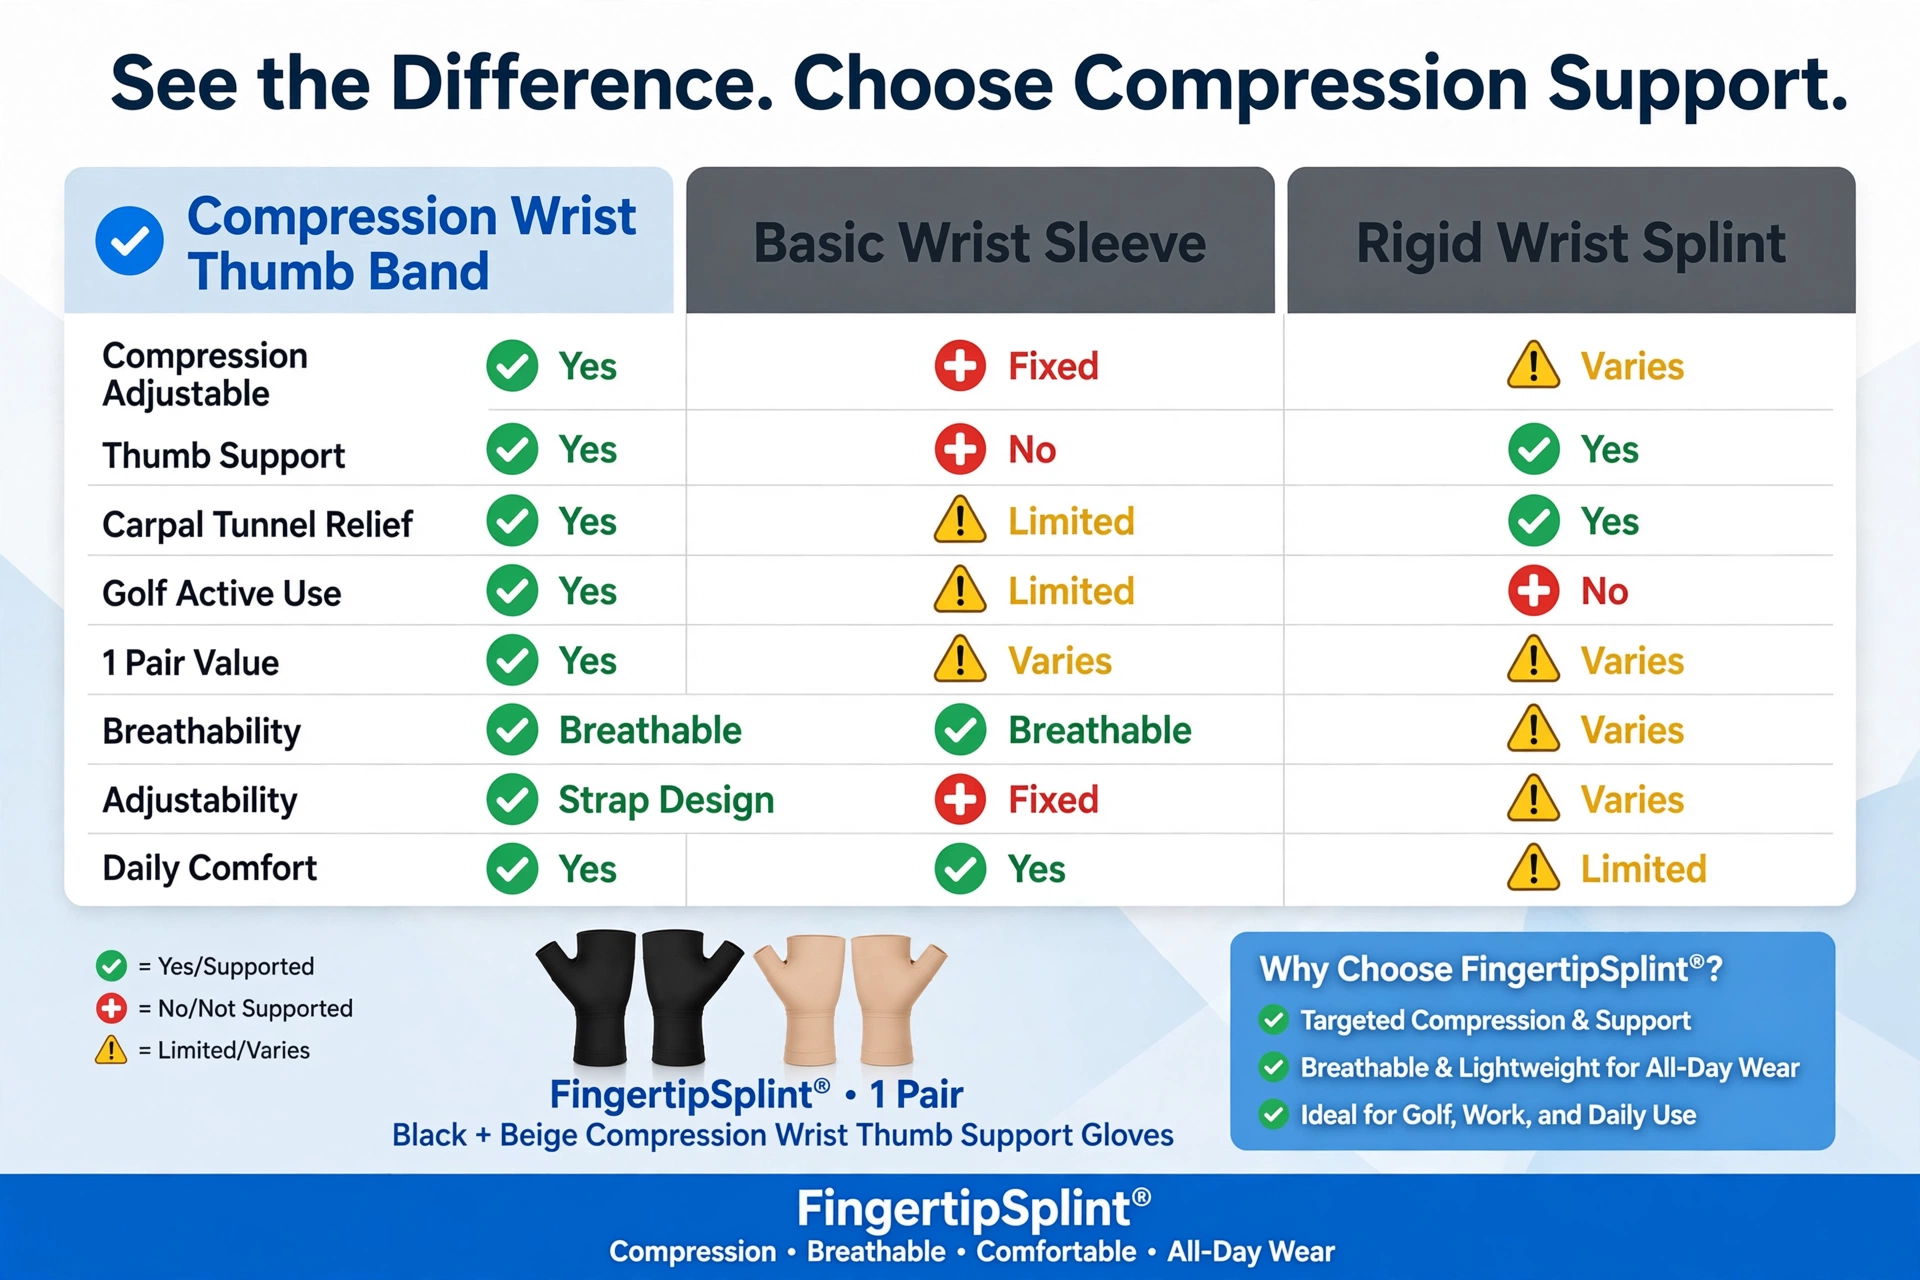
For readers who want to compare fit and comfort across different designs, the article on wrist and thumb brace for daily support covers everyday-use considerations. And for readers whose priority is active use, the guide on wrist and thumb support for golf and active use addresses sport-specific fit and grip concerns.
Before purchasing, review the product listing for sizing, coverage, fastening mechanism, and care instructions. Only rely on features the manufacturer has explicitly confirmed. For personalised guidance, you can request a quote or review the frequently asked questions.
The 4-Point Wrist Brace Fit Check
Select a point below to see what to check.
Explore the Compression Wrist & Thumb Support Brace
Review the FingerTipSplint Compression Wrist & Thumb Support Brace, check its product details, and decide whether it suits your fit, comfort, and support needs.
View the Product Browse All ProductsFrequently Asked Questions
Measure at the point specified by the manufacturer — usually wrist circumference — and compare your measurement with that specific product’s size chart. Do not rely on a generic chart, as each manufacturer uses its own sizing. If you fall between sizes, choose the larger size rather than the smaller one.
It should feel secure without causing pain, numbness, tingling, swelling, or changes in finger colour or temperature. If any of these warning signs occur, loosen or remove the brace. Snug compression is not the same as tight compression.
The choice depends on the area that requires support. A wrist-only brace supports the wrist joint but leaves the thumb unrestricted. A combined wrist and thumb brace provides additional coverage around the thumb base but adds bulk. If you are unsure, professional assessment can help identify which area needs support.
There is no single best material. Flexible fabric and elastic blends are generally breathable and comfortable for extended wear. Neoprene provides warmth and firmer compression but can trap moisture. Comfort depends on your climate, skin sensitivity, activity level, and how long you plan to wear the brace.
Recheck the sizing, orientation, and fastening of the brace. A brace that slips may be the wrong size, may be positioned incorrectly, or may have worn straps. Do not compensate for a poor fit by tightening the brace excessively. If it continues to slip, consider a different design or size.
Wearing time depends on the product and the reason you are using it. Some braces are designed for extended wear, while others are intended for specific activities. Follow clinical guidance where applicable, and avoid continuous wear unless instructed to do so.
Remove or loosen the brace if it causes numbness, tingling, increased pain, skin irritation, or changes in hand colour or temperature. If symptoms persist or worsen after removing the brace, seek professional advice rather than continuing to wear it.
Conclusion: Fit Is Only One Part of Choosing a Brace
Fit is only one part of choosing a compression wrist brace. The design must also match the intended use, the level of support required, and the area that needs support. A brace that fits well but is designed for the wrong purpose will not help — and may cause new problems.
Use this buying guide as a framework: measure carefully, check the fit after putting on the brace, evaluate materials and adjustability, and review the product details before purchasing. If your symptoms are persistent, severe, or worsening, seek professional assessment rather than relying on a brace alone.
For readers who want to explore support options, the FingerTipSplint shop offers a range of products. For healthcare providers and distributors, the medical finger splint supplier page provides additional information. For more buying and support articles, visit the FingerTipSplint blog.
Your hands are involved in almost everything you do. Choosing the right support — and making sure it fits — is an investment in your daily comfort and function.